Easy Sheet Pan Eggs Recipe
Eggs are such a nutritious, affordable, and versatile ingredient! And while we especially love our scrambled eggs, cottage cheese egg bites, and pizza eggs, these sheet pan eggs save me SO much time. They will for you as well! They are just so perfect for meal prep breakfast. Make ahead, store in the refrigerator or freezer, then reheat or enjoy cold whenever you are ready! I say breakfast, but these are also a lunch packing parent’s dream come true! There’s no time to cook fresh eggs in the already hectic mornings, and you don’t want to be sending hard-boiled ones all the time (of course you can if your child doesn’t mind. Mine started rejecting after a while…) Oh I can’t wait for you to try this recipe! It’s the easiest way to cook more than a dozen eggs at once. Let’s get started 😉
Ingredients
The exact amounts that you need are listed in the recipe card below.
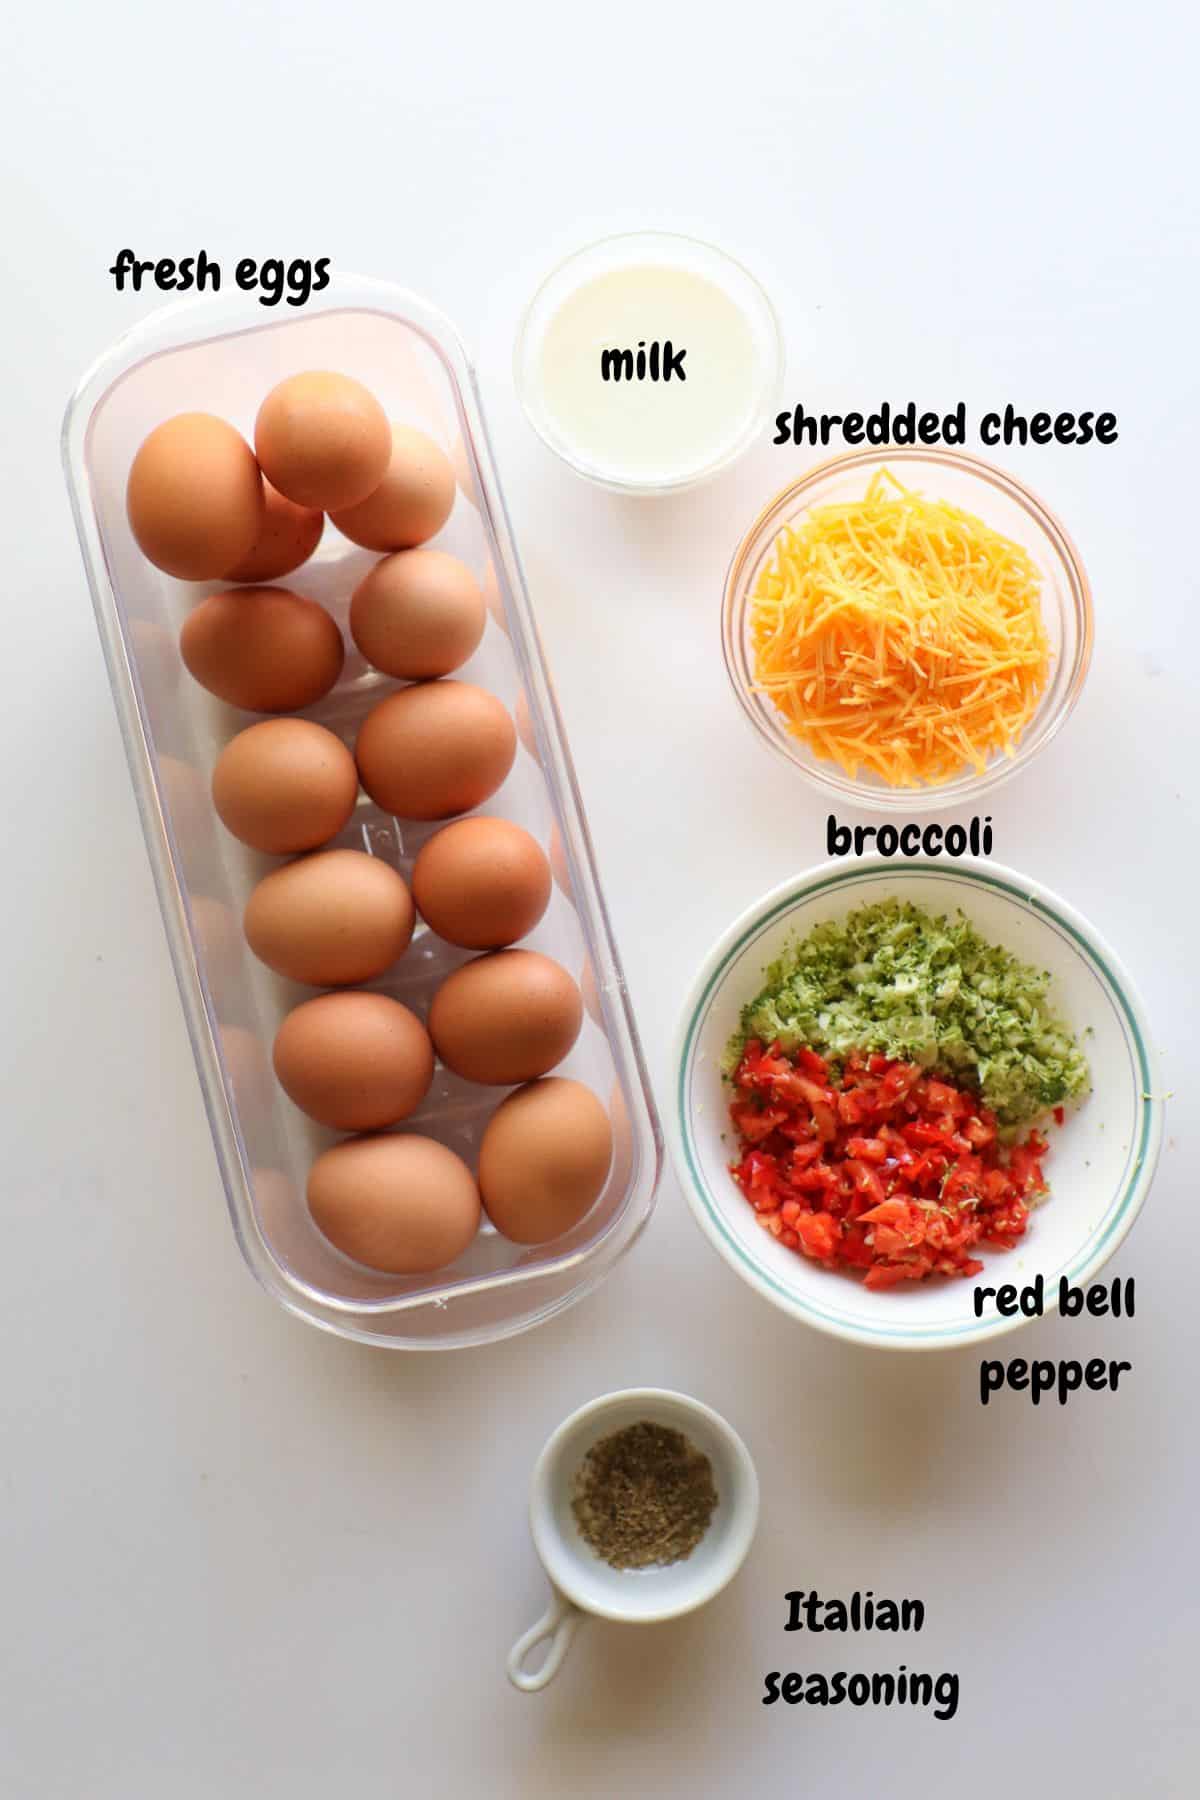
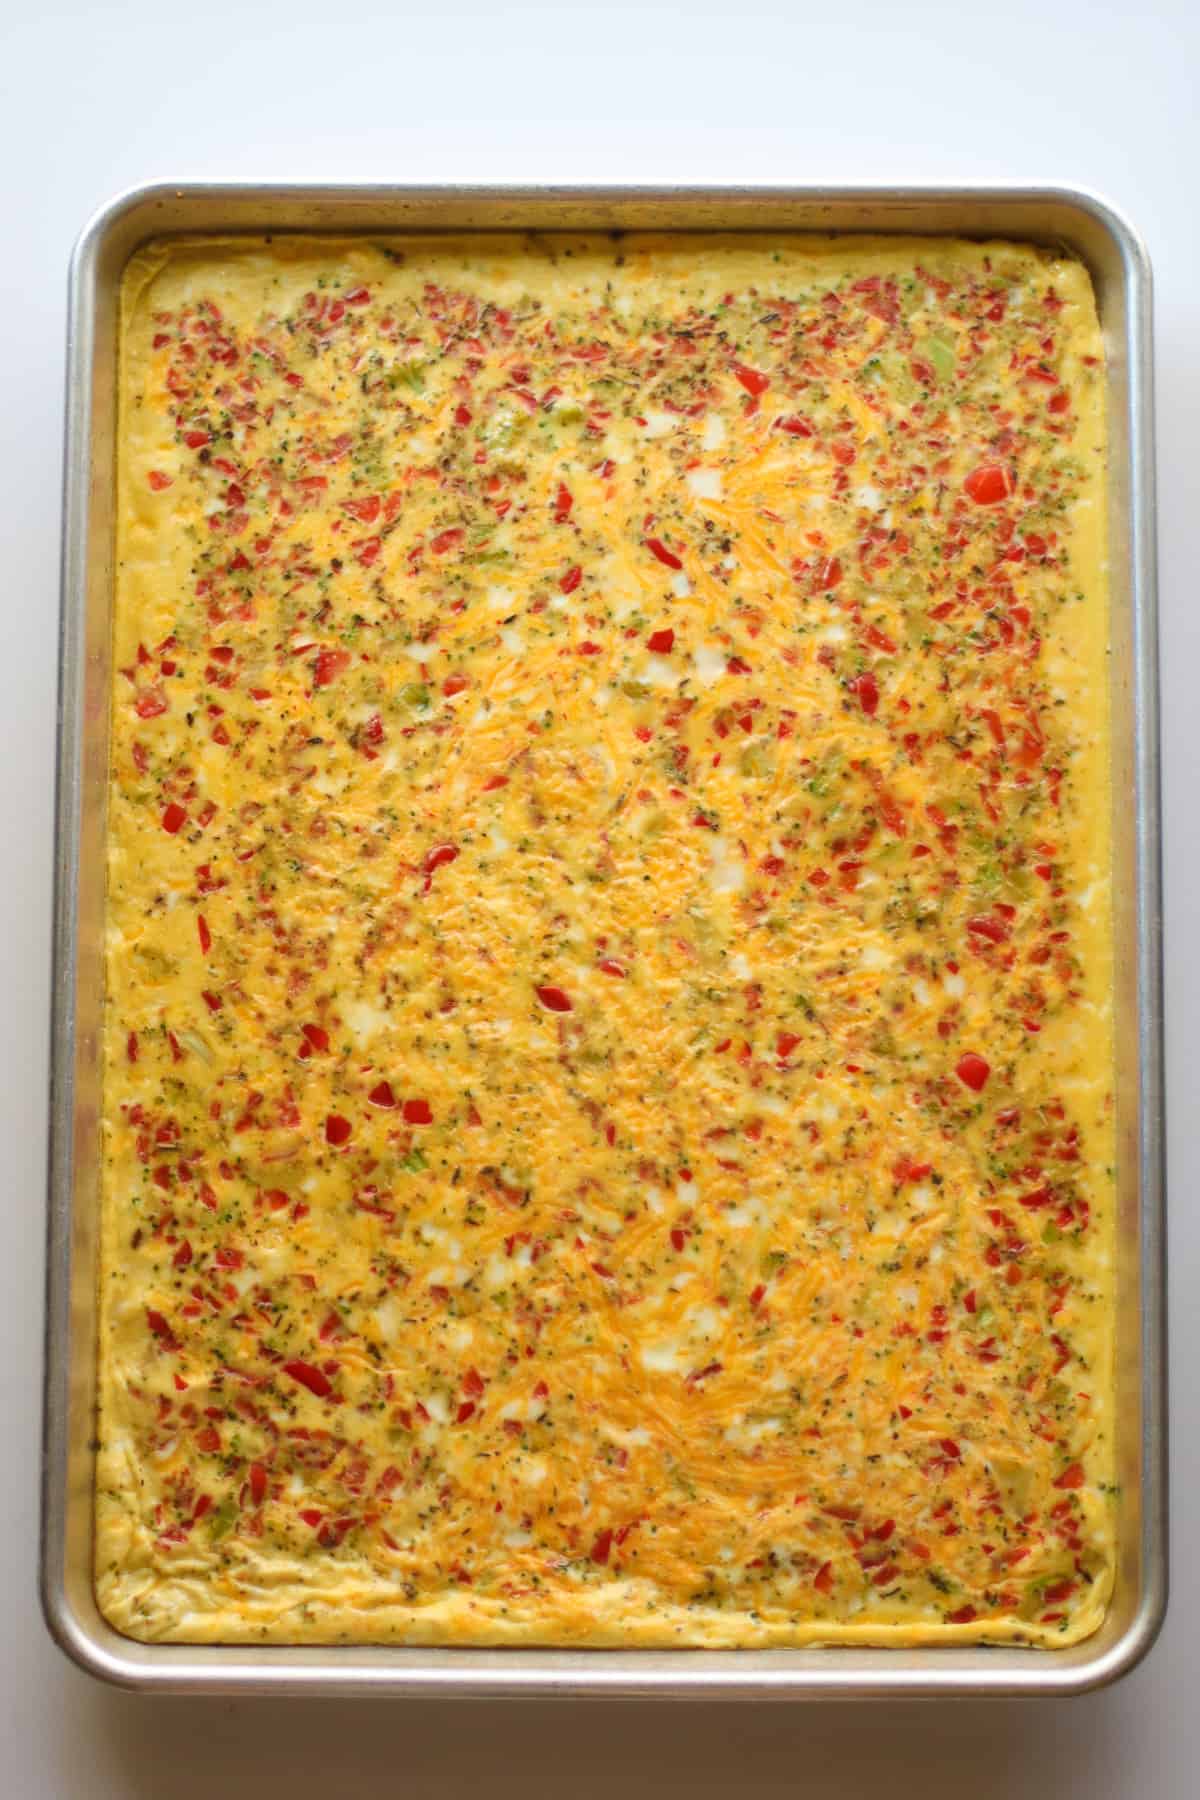
Eggs – Use the freshest eggs available! You will need 14 large eggs. It sounds like a lot, I know! But all that cracking will pay off big time! Milk – I recommend using whole fat milk but any plant-based milk will work! Vegetables – I like to use broccoli and red bell peppers. Go ahead and add your favorite vegetables (but not too much. Refer to the tips for success section). Shredded cheese – I recommend cheddar cheese but feel free to any of your favorite cheeses. I told you this is a super customizable recipe!
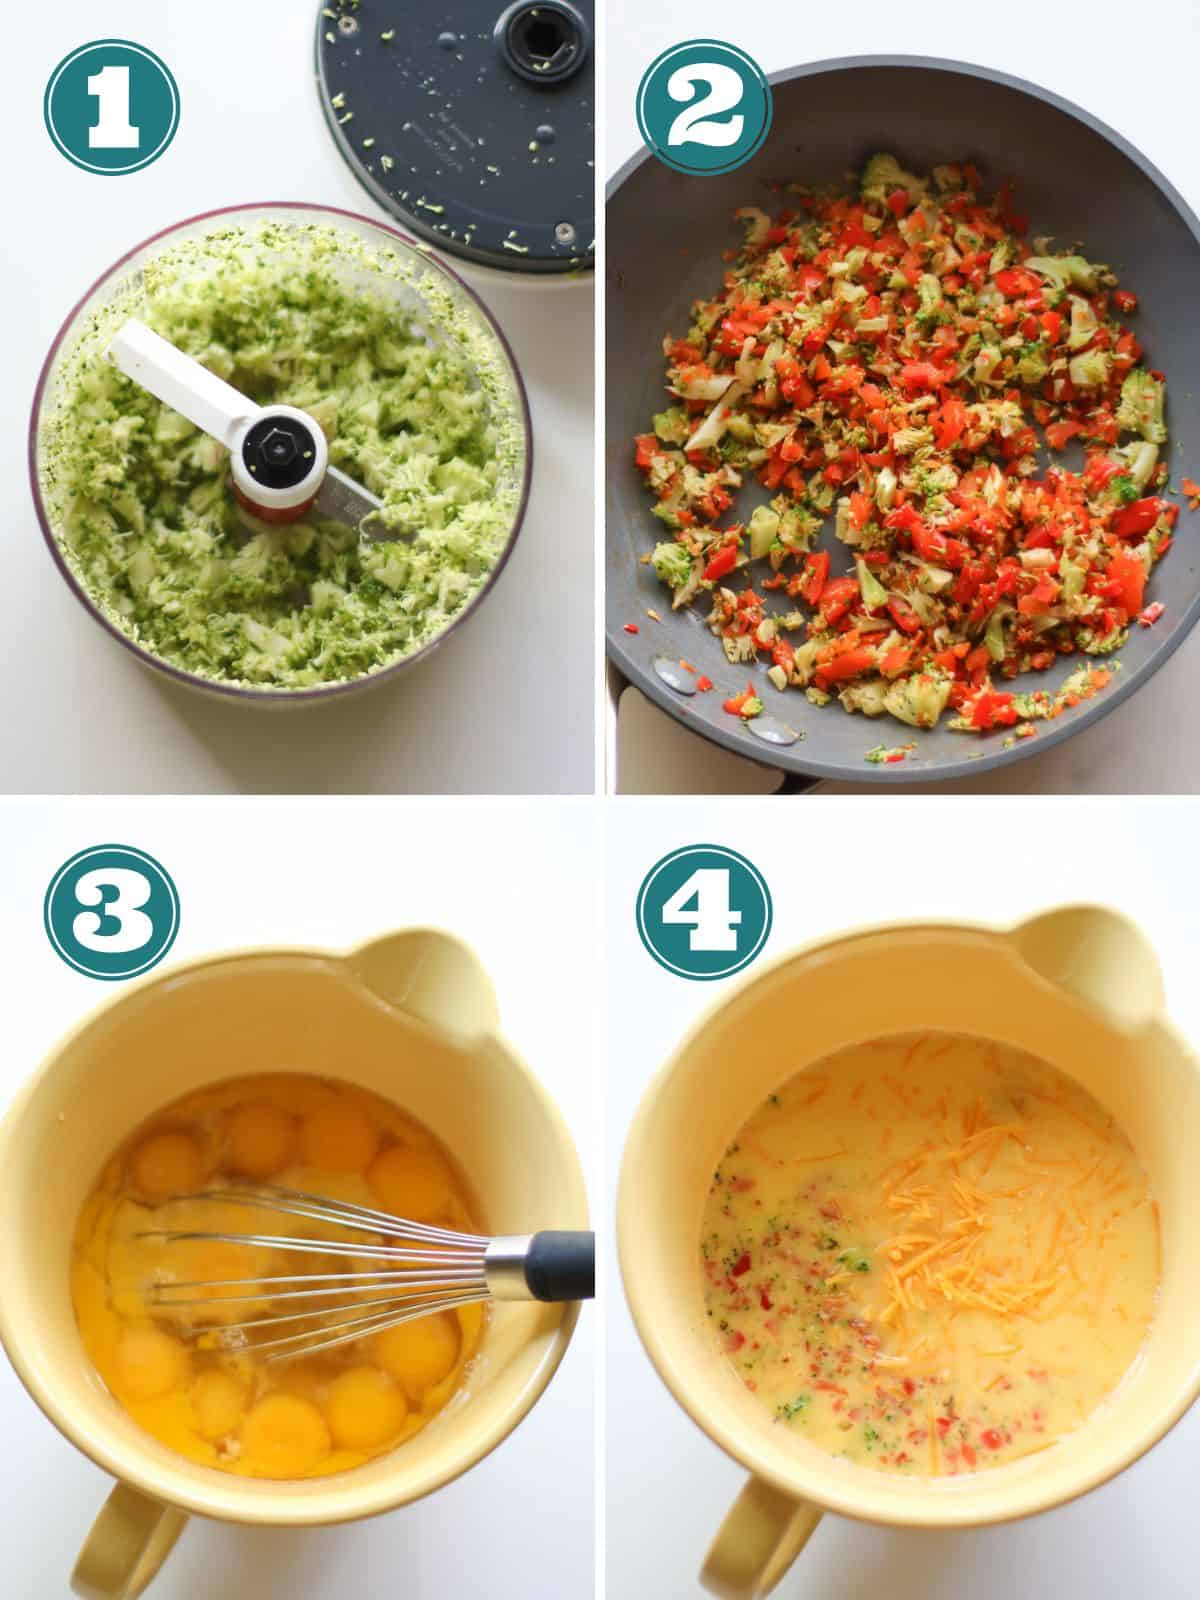
Step-by-Step Instructions
Tips for Success (MUST read)
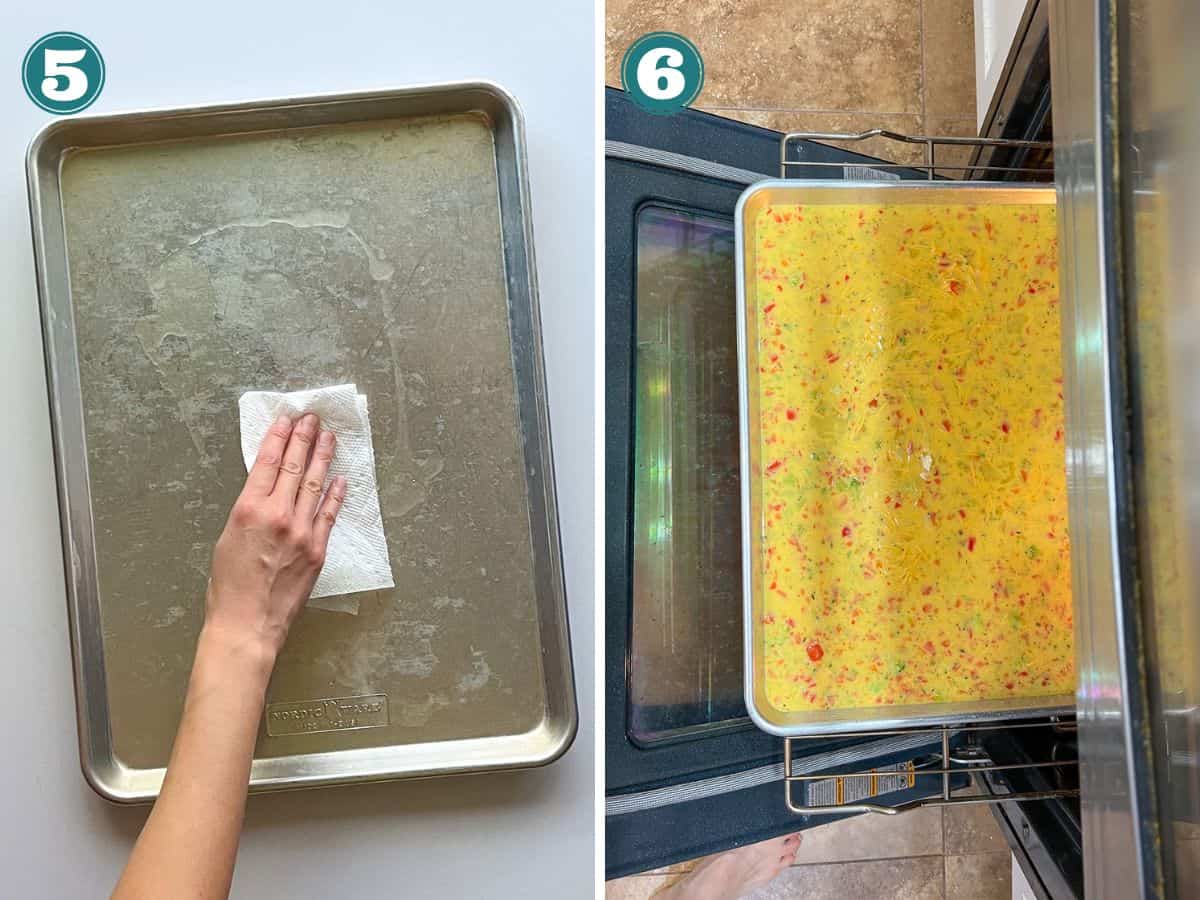
Don’t overload on vegetables. Otherwise, you will add a lot of moisture to the eggs, which will prevent them from cooking properly in the oven. I’ve found 1 cup of vegetables to be most ideal. Cook the vegetables with seasoning(s)! Not only will this extra step impart great flavor to the eggs but cooking will help release moisture which is really important if you plan on freezing. Grease the sheet pan well either with a cooking spray or by pouring olive oil directly onto the sheet pan and rubbing it all over using your hands or a paper towel. This is SO important. Otherwise your eggs WILL stick! It will also make cleanup a breeze. While you can line with parchment paper, I’ve found that the bottom of the eggs gets soggy as it cools. Use a rimmed baking sheet! The last thing you want is raw eggs spilling out all over your kitchen. Place the greased pan in the oven and then pour in the egg mixture. I don’t know about you, but I sure don’t want to walk around with runny eggs in my hands, especially since my toddler is always at my feet.
Serving Suggestions
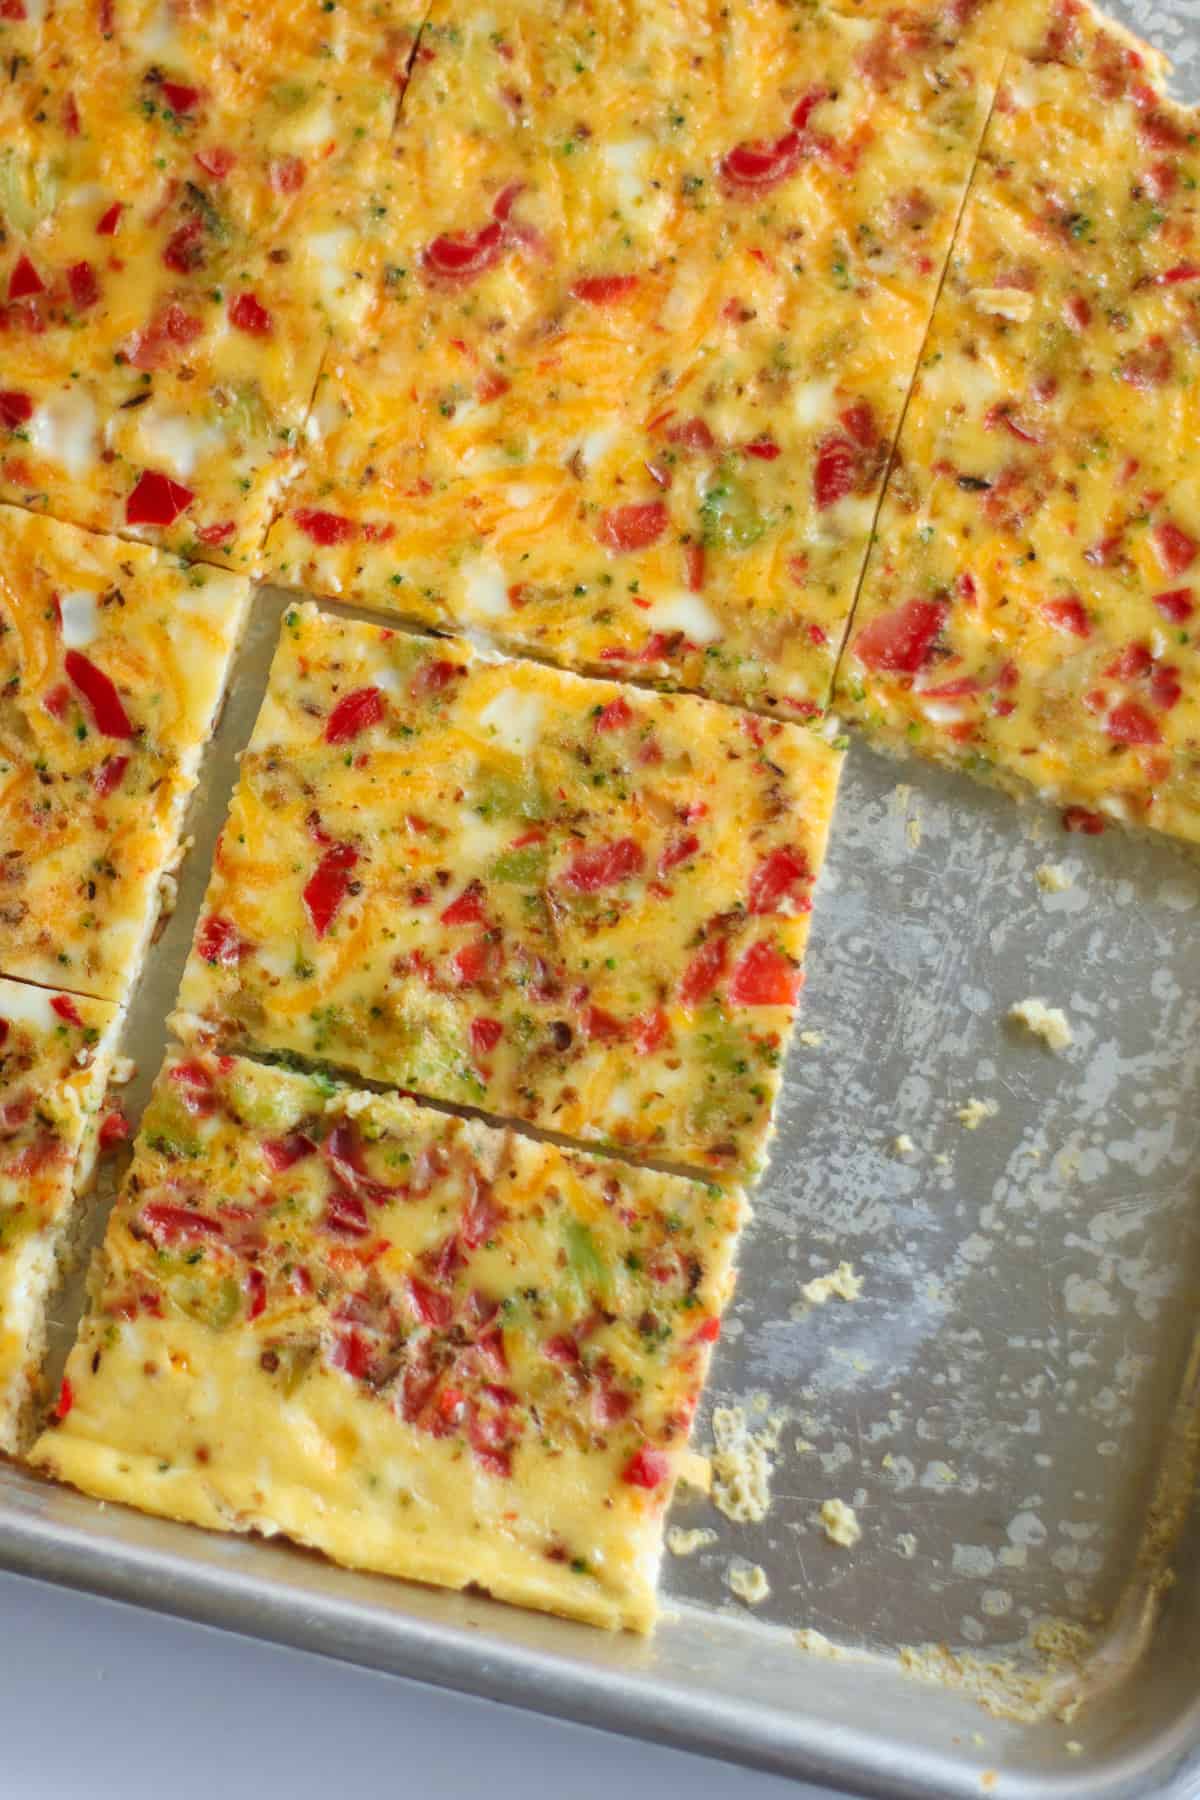
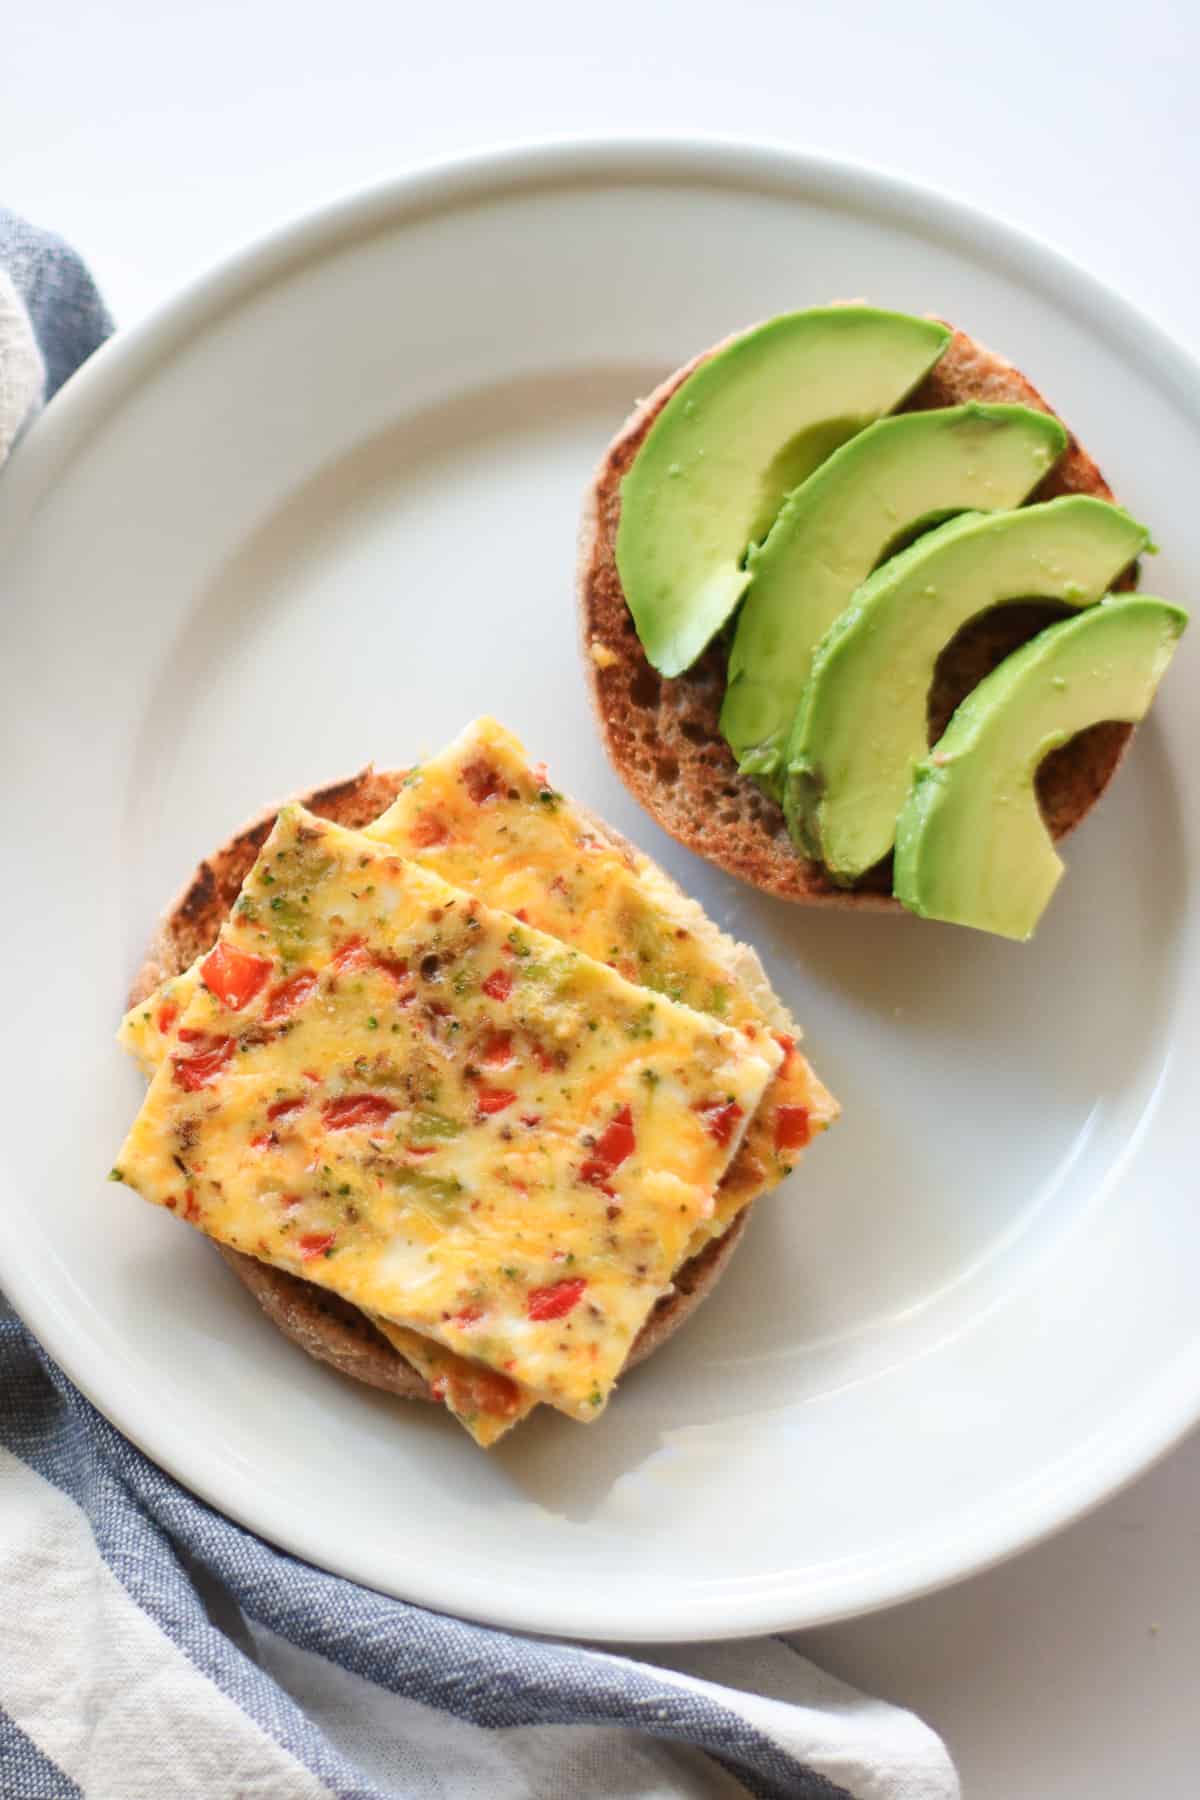
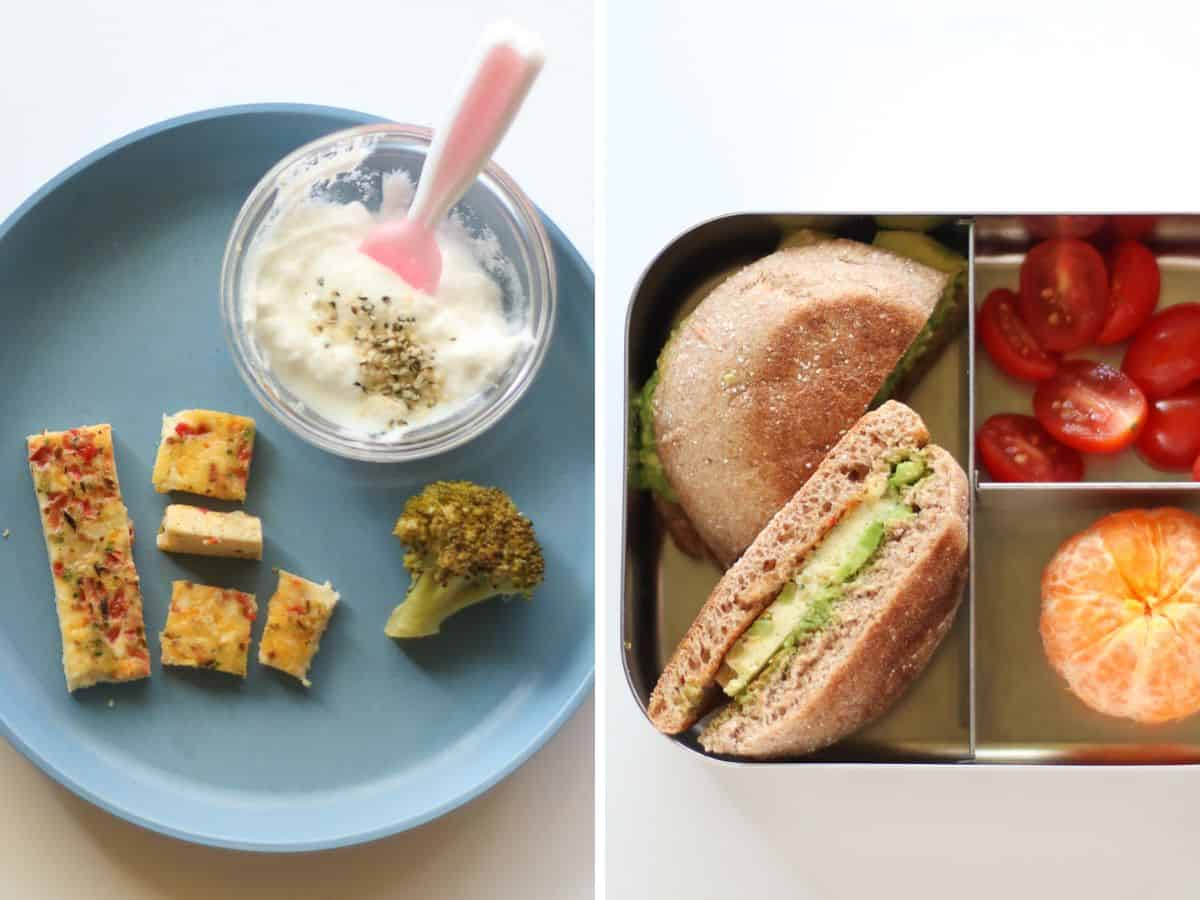
Enjoy as is with some fruits and/or vegetables on the side for a quick and healthy breakfast or snack. Easy breakfast sandwich – Slice the eggs into squares or rounds (I use a sandwich sealer). Spread some mashed avocado, cream cheese, or hummus onto bread of choice (e.g. english muffins and bagels) and top with egg slice(s). Egg wrap – Slice the sheet pan eggs into long rectangles. Top with whatever fillings (like mashed avocado and leftover chicken) and roll up!
As mentioned earlier, eggs don’t have to be just for breakfast! Serve with various sides for an easy and fun dinner for the whole family. 50+ Easy Family Meals
Equipment
Even though I use my sheet pans ALL the time, whether it’s roasting vegetables (like these roasted Brussels sprouts and carrots) or making various baked goods, I never thought to look into a high-quality one, partly because I didn’t think it’d make that much difference. Turns out it makes ALL the difference in the world! These are seriously my favorite sheet pans, and I can’t live without them now! They are super durable and conducts heat efficiently and evenly. This means your cookies, for instance, will start baking right away and stop baking as soon as you pull them out. It also doesn’t warp, unlike all the other pans I’ve tried where one side becomes raised higher than the other, resulting in uneven cooking.
How to Freeze Sheet Pan Eggs
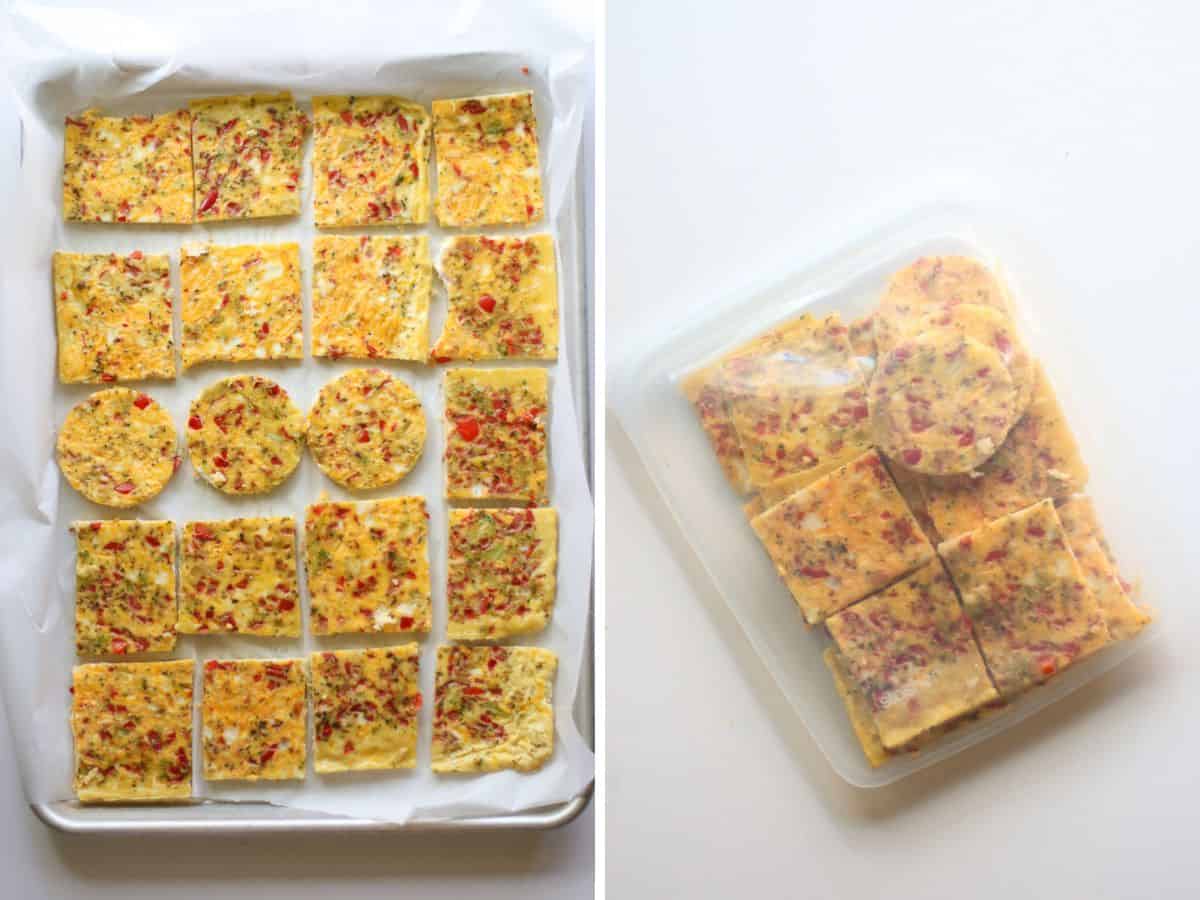
The first and most important step is to let the eggs cool completely! This will help prevent ice crystals from forming, which can lead to an unpleasant texture and flavor. Then set some aside to enjoy during the week, if intending. They will last up to 5 days in the refrigerator. Place the rest of the slices onto a LINED baking sheet, making sure there is space in between them. Freeze for at least 30 minutes until frozen solid. This extra step will prevent the slices from sticking together, which eliminates to need to wrap them individually in plastic wrap. Less waste and more time saved. Finally, transfer to a freezer safe bag or an airtight container. Freeze for up to 3 months! Did you make this recipe? Leave a rating below and let me know how you liked the recipe! Your feedback means so much to me!